Network Automation (IaC) with CI/CD Tools
Table of contents
0x01 What is CI/CD and why?
Before we dive deeper into CI/CD tools, we need to know CI/CD, what is CI/CD. According to the definition by RedHat, CI/CD is a method to frequently deliver apps to customers by introducing automation into the stages of app development.
But wait, you may ask what it can do for network tasks, for the job each network engineer may face every day? As a network engineer, sometimes we have to repeat a job many times, which costs countless time we never realized. In the world of Network Automation, the target is to leave tasks as many as possible to the program, the only thing we should focus on is what the program unable to do. This article will show you how to use Jenkins and Ansible to automate the task that add new ACL to a Cisco firewall.
0x02 Getting Started
Prerequisites
-
Operating System
The demonstration below uses RHEL as operating system for both Jenkins and Ansible instances, you can choose other distributions if you don’t have RHEL license.
-
Jenkins Controller
The module of Jenkins we will use can be covered by the default settings after installation, so in this article, the detailed steps for the installation of the Jenkins controller will not be shown, you can click on this link for reference.
-
Cisco Firewall
Because the device we are going to integrate with Ansible is Cisco firewall, the ASA, you should have the basic knowledge about it and its configuration as well, click on the link for reference.
Versions
For some errors happened in the following the steps in this article may be caused by different versions of the system we use, the versions used in the demonstration can be refer below:
- RHEL 9.0
- Jenkins 2.373
- Ansible [core 2.12.2]
- Cisco ASA 9.8(4)15
0x03 Stages
Basic Setting@Jenkins Agent Node
Create Jenkins management user, which will be used for task pushing like Ansible Playbook, Ansible Ad Hoc Commands.
## Change user to root
useradd -m jenkins
passwd jenkins

## Sudoers config for jenkins user
echo 'jenkins ALL=(ALL) NOPASSWD: /usr/bin/yum' > /etc/sudoers.d/<config_name_for_jenkins_user>
# OR if you prefer EOF syntax
cat << EOF > /etc/sudoers.d/<config_name_for_jenkins_user>
jenkins ALL=(ALL) NOPASSWD: /usr/bin/yum
EOF
In this example, we will use SSH public key to handle the SSH connection with Jenkins agent node, so here we use command below to copy the public key to our target node.
## Copy SSH public key to agent within the jenkins user
ssh-copy-id -i </path/to/your/public_key> <jenkins_user>@<target_agent_host>
Another thing you should keep in mind about SSH connection is to set the default crypto policy to SHA1 because the version of Cisco ASA we are going to integrate is too low to make SSH connection from RHEL 7+. Click on the link for more information.
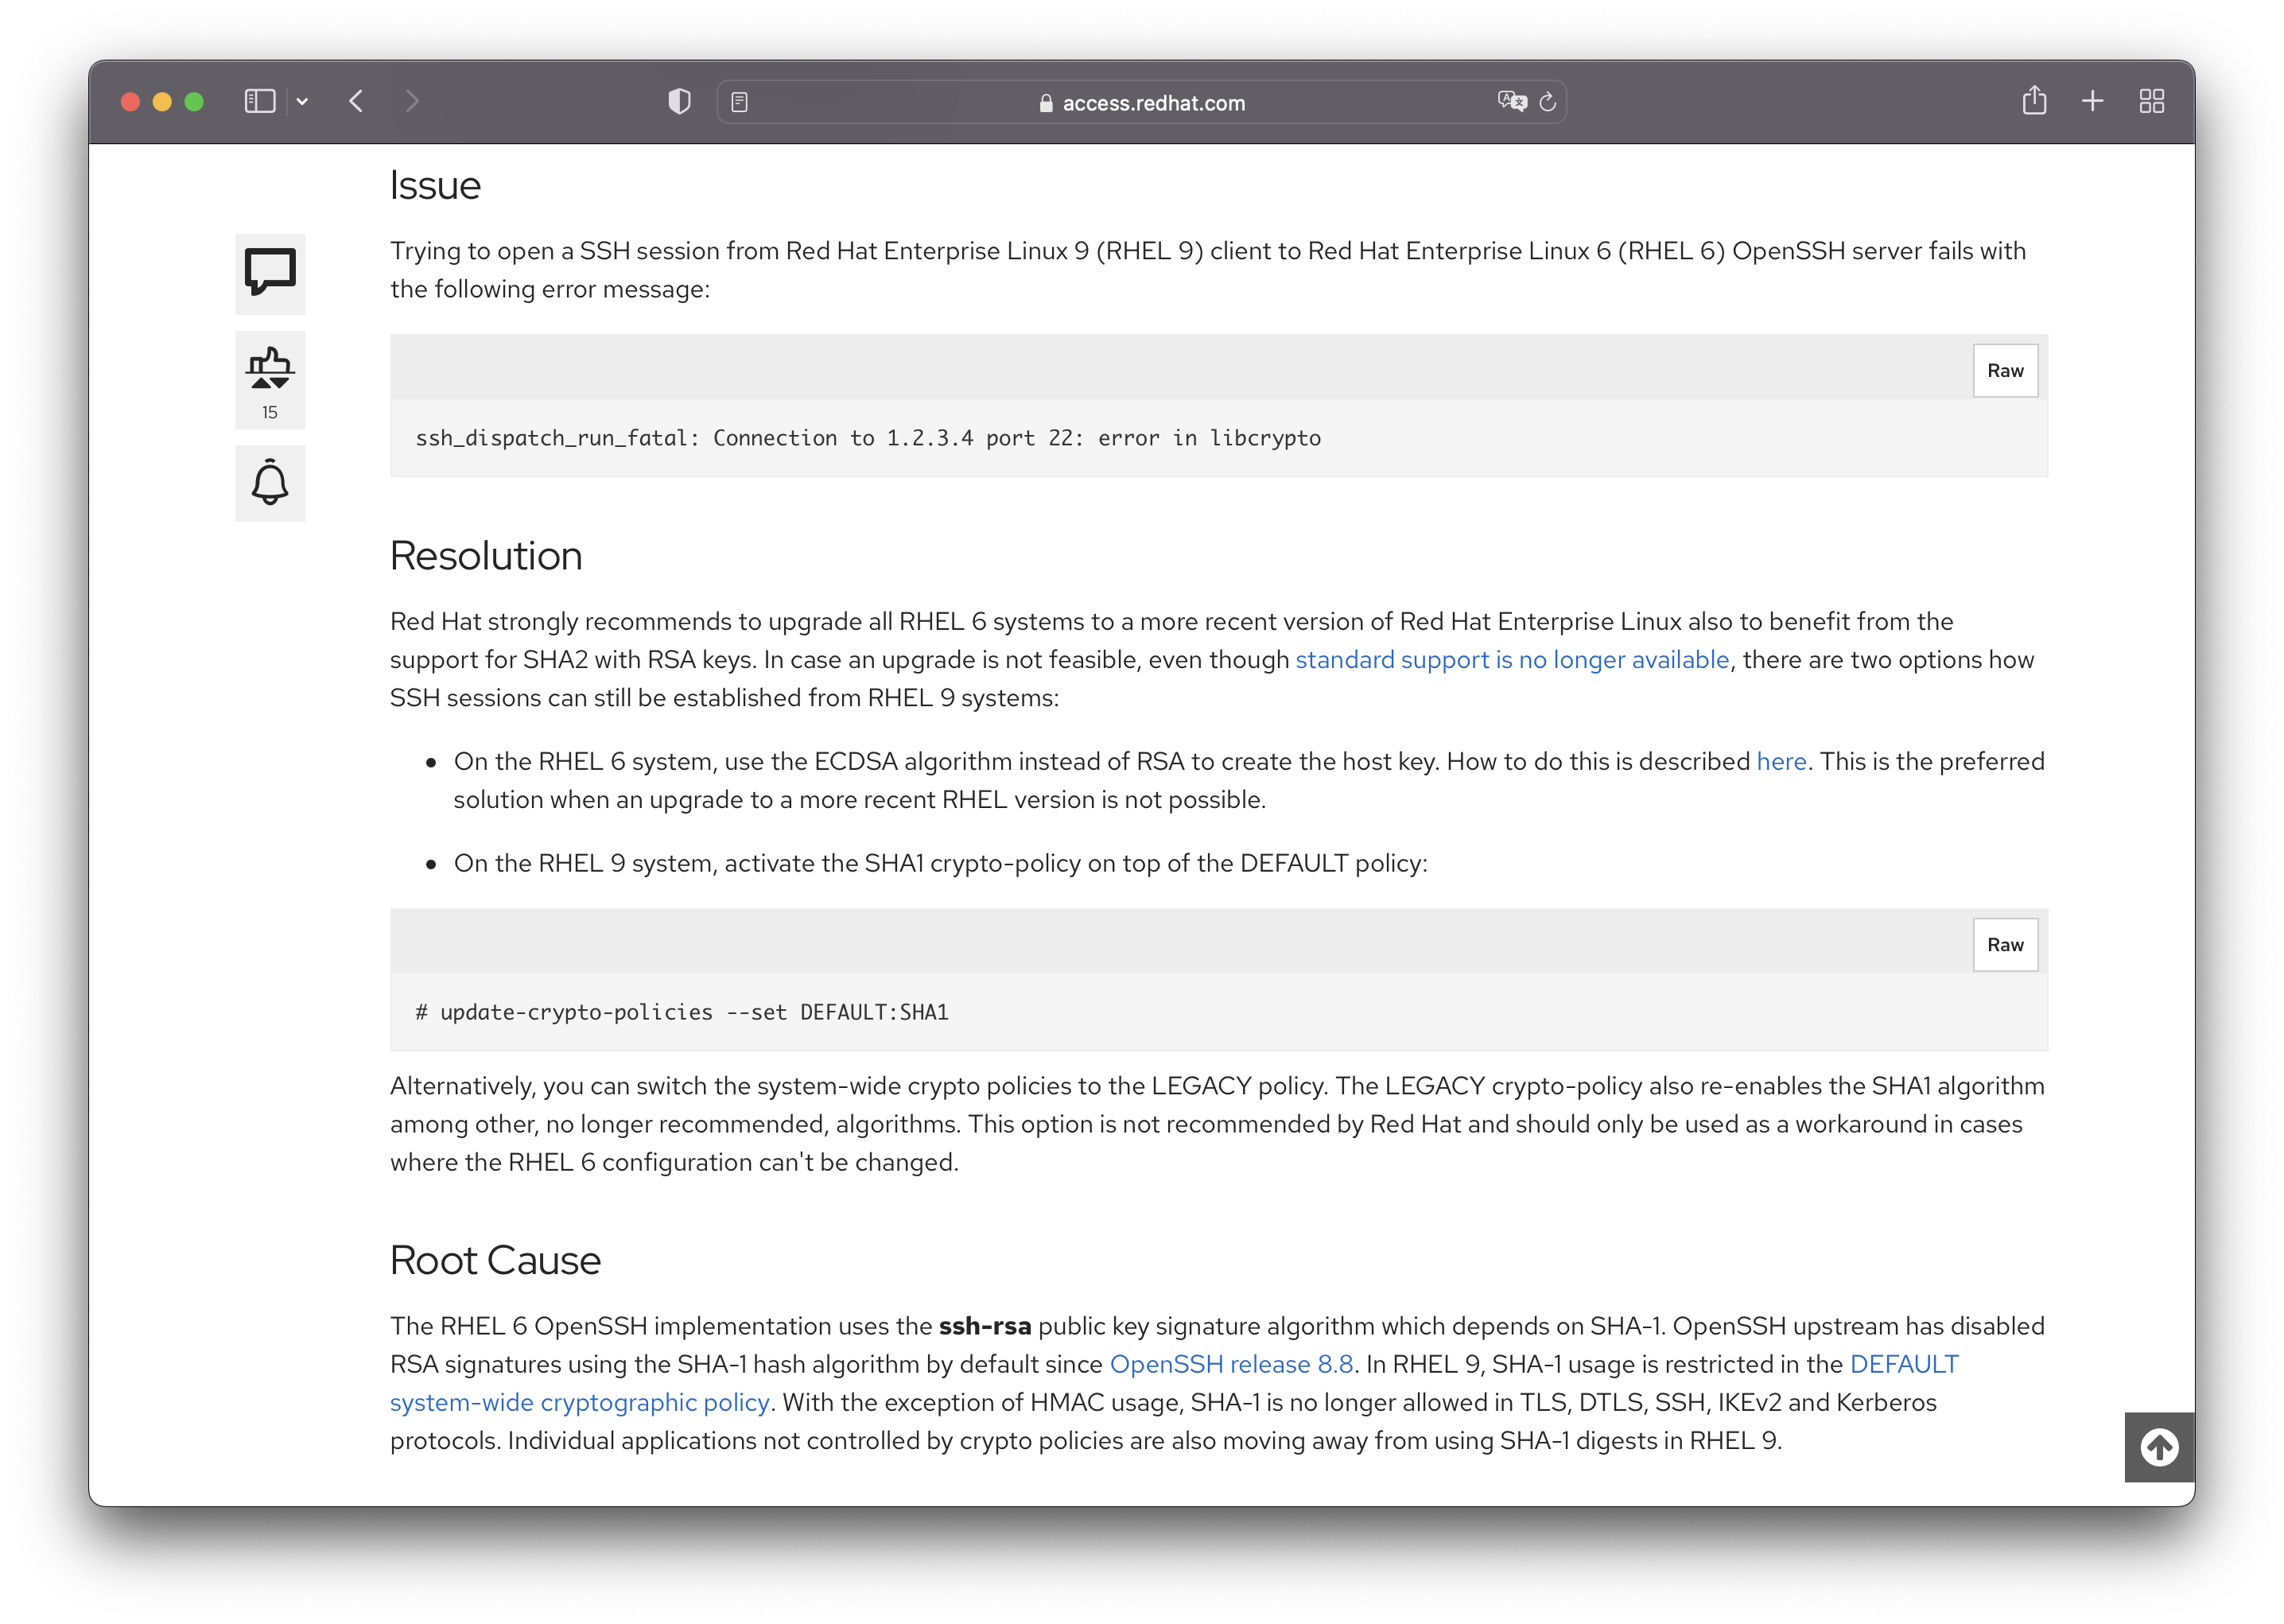
Use the following command to change the crypto policy. (You can ignore if you are using another Linux distributions)
# update-crypto-policies --set DEFAULT:SHA1
Integration Setting@Jenkins Agent Node
Ansible
The Ansible platform is what we will use to push commands or execute Ansible playbook to target devices, so we firstly need to install and initialize it. In RHEL, the installation is quite easy, you can use the command below in your shell to complete it.
## Because module cisco.asa require ansible 2.9+, here we install the latest version of ansible with YUM
sudo yum install ansible-core
Once you’ve done the step, then install the dependent packages in order for basic environment and Cisco firewall support.
# Install pip if you use RHEL
sudo dnf install pip

# Paramiko is the default SSH connection module that Ansible will use
python3 -m pip install paramiko

# Install the official cisco.asa module
ansible-galaxy collection install cisco.asa
Jenkins
The version of JDK we’ll use in Jenkins controller is Java 11, so we have to install the same version of JDK on the agent node. The following command can list the JDK packages available in yum.
# Search for the JAVA JDK in YUM repos
yum --showduplicates list java-11-openjdk
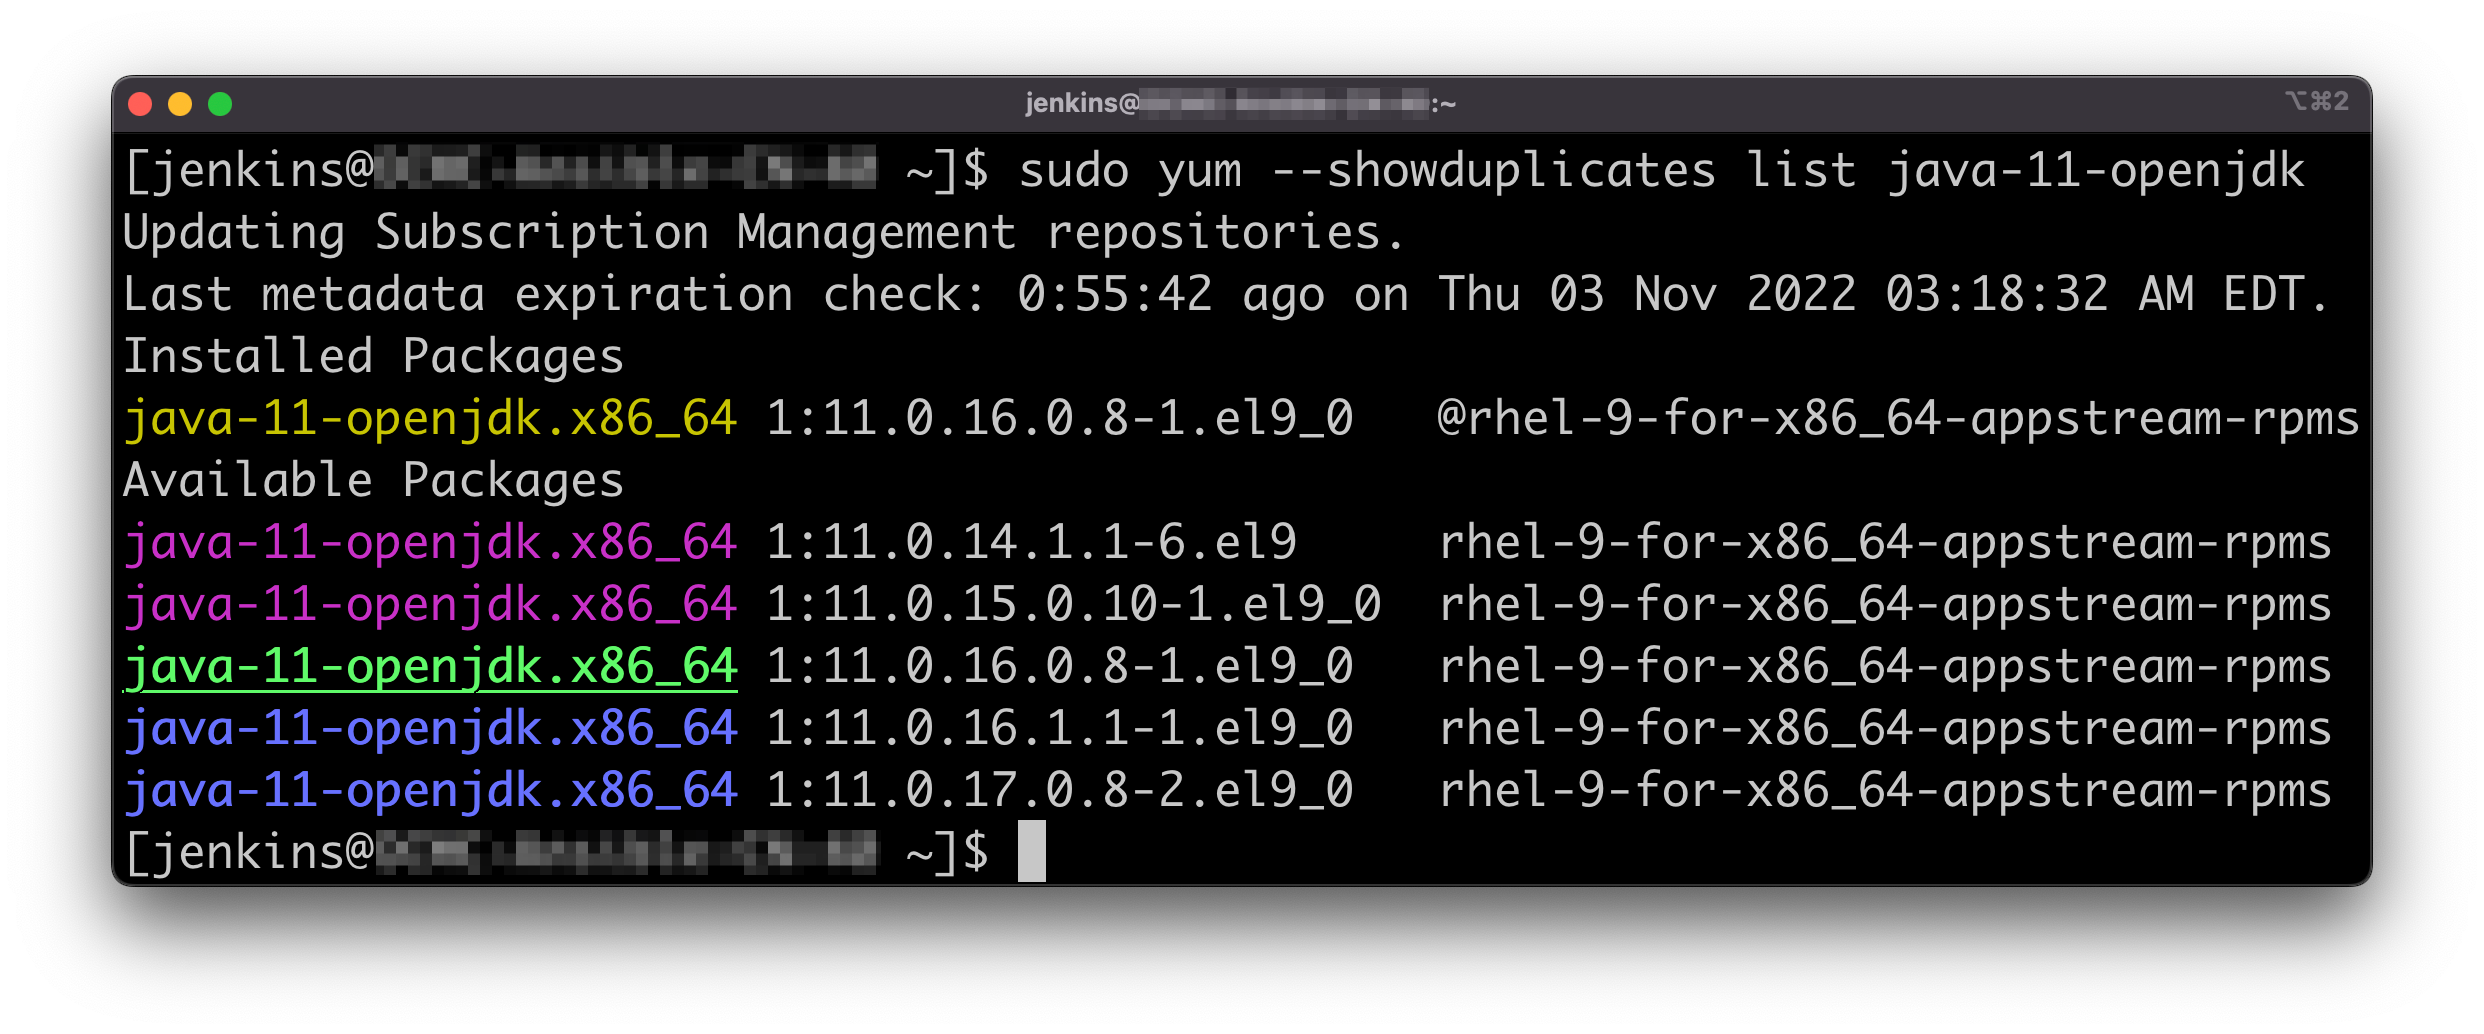
Use the following commands to install and check if the JAVA JDK is successfully installed.
# YUM install JAVA JDK
sudo yum install java-11-openjdk-1:11.0.16.0.8-1.el9_0

# Check JAVA version
java --version
Then configure the JAVA_HOME envrionment variable.
java -XshowSettings:properties -version 2>&1 > /dev/null | grep 'java.home'
export JAVA_HOME=<populated with value from last command>
Jenkins node integration@Jenkins Control Node
Controller
Please keep in mind, both controller and agent nodes should be running with the same Java version.
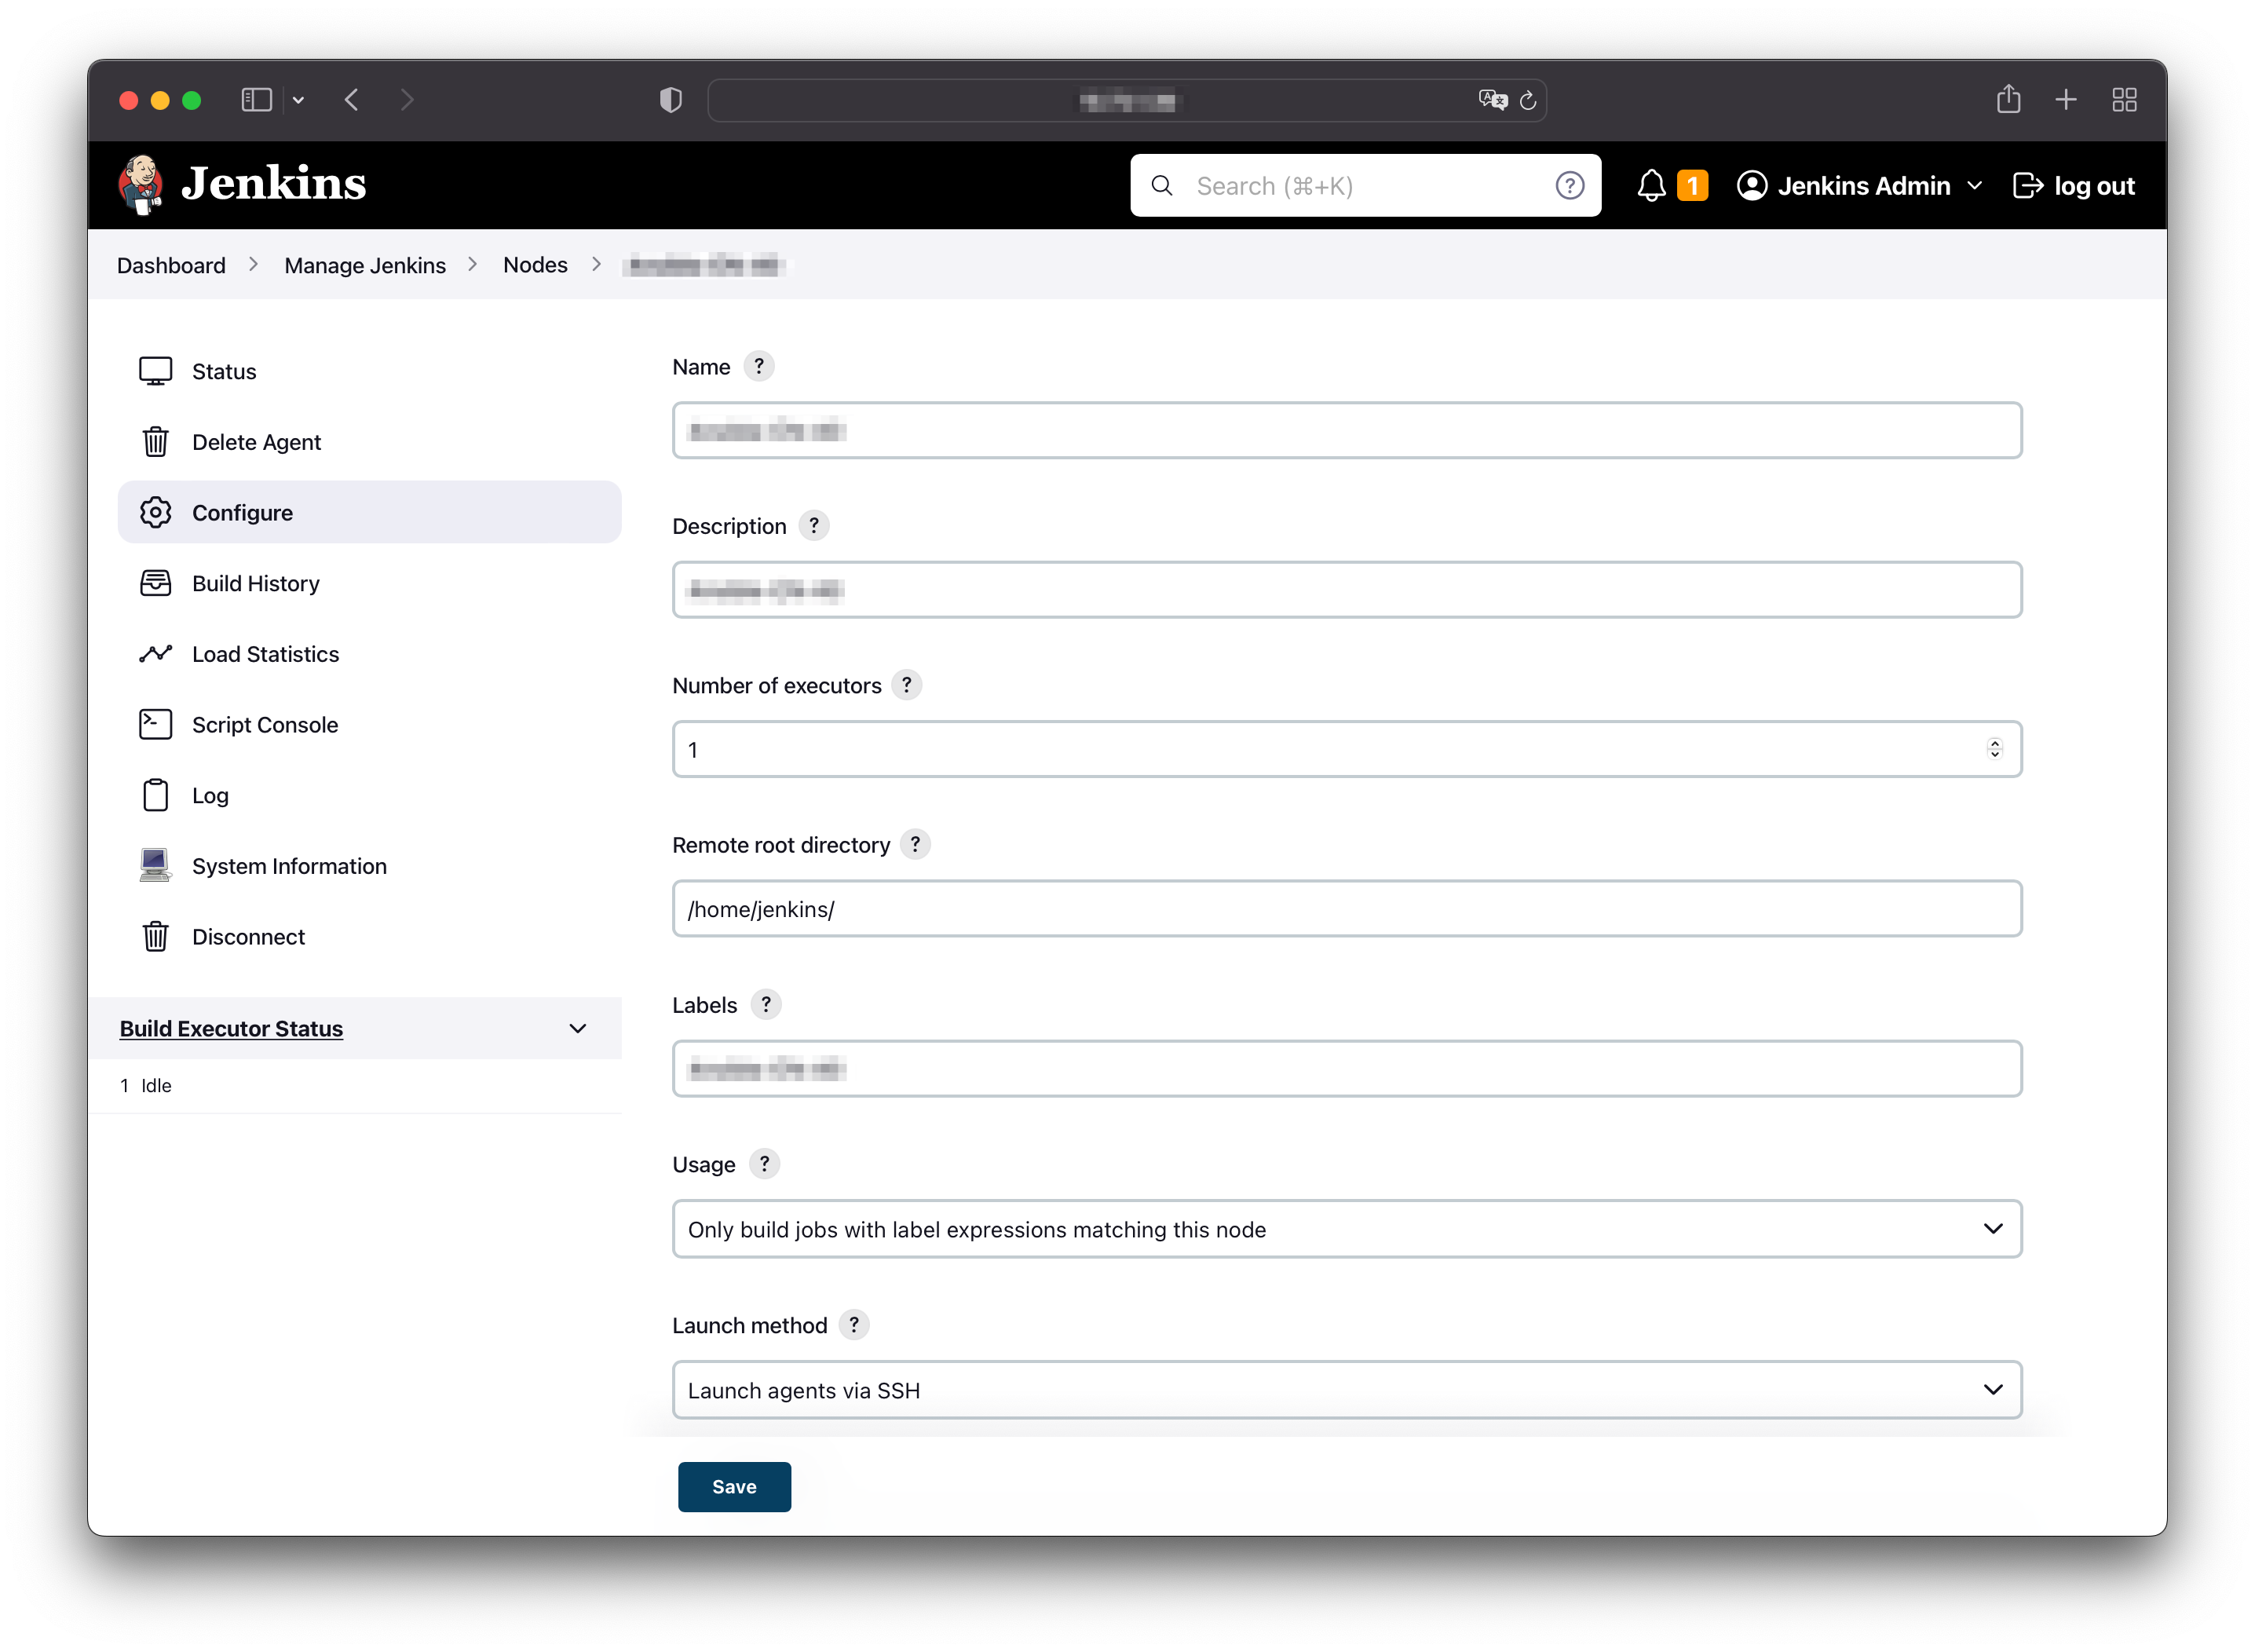
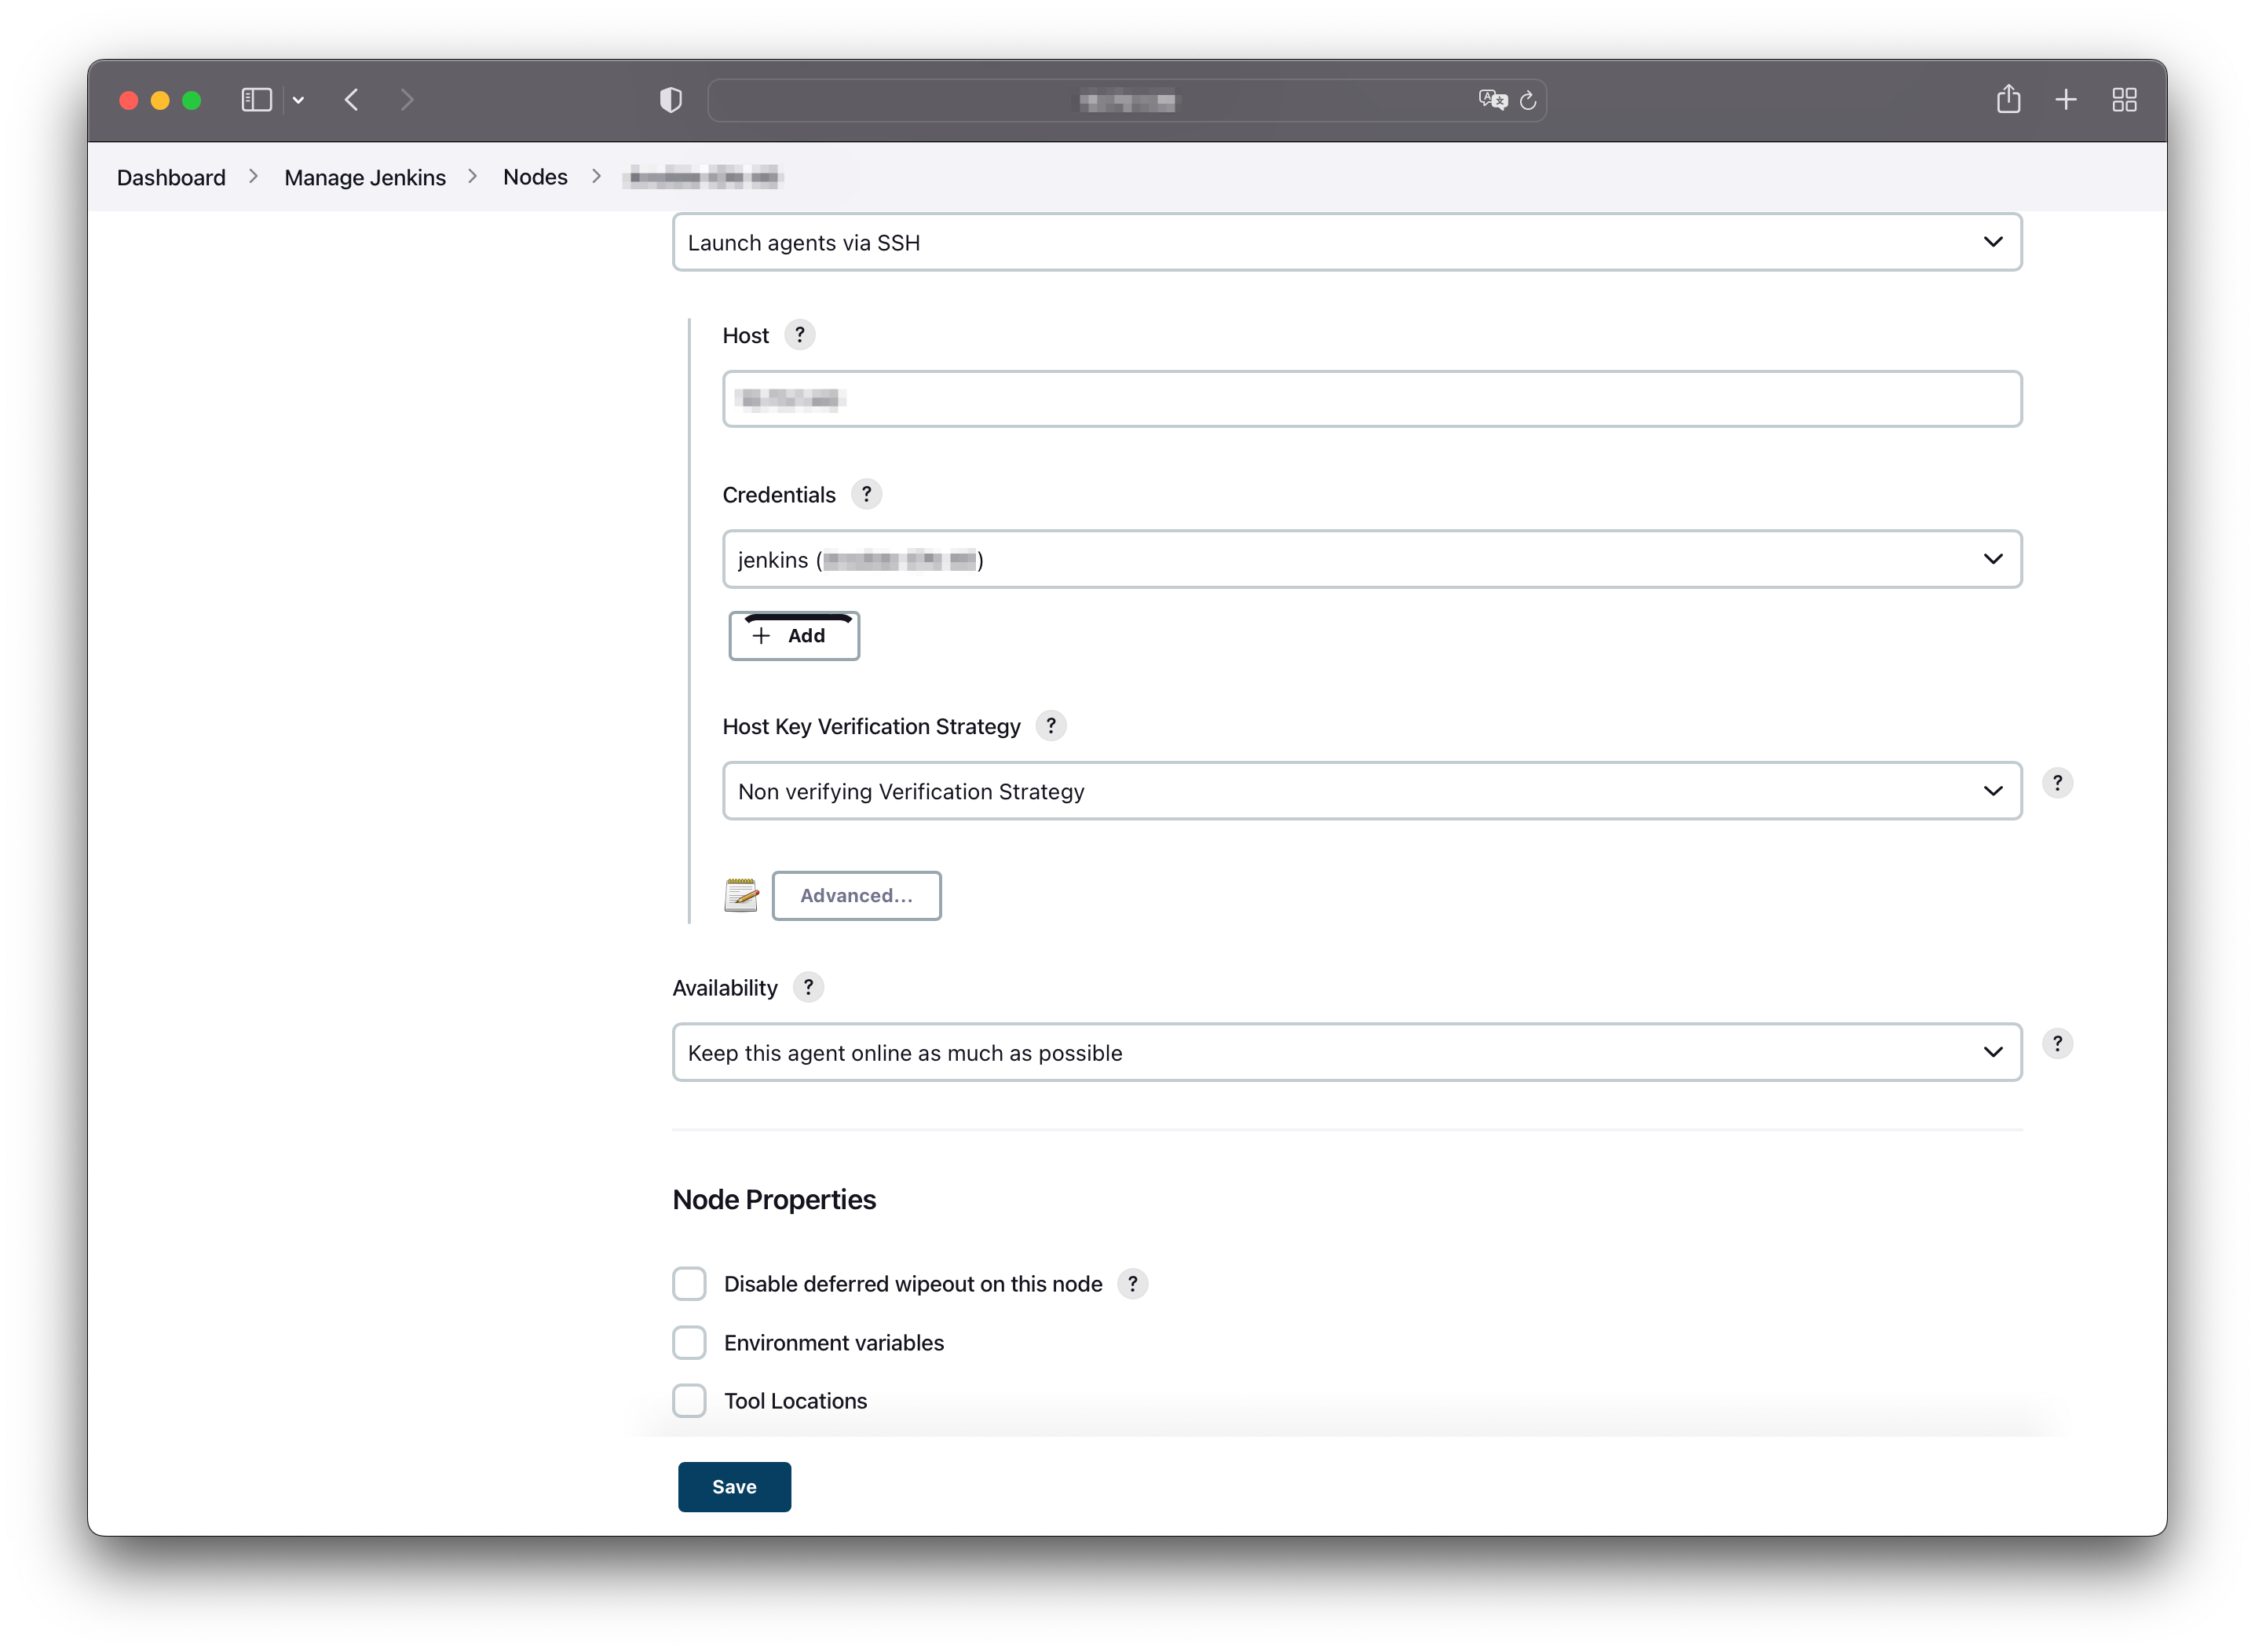
As the the initialization of the Ansible control node completed, the next step is to add the node as a Jenkins agent into the Jenkins portal. After you log in, find the Nodes setting by following the path: Dashboard/Manage Jenkins/Nodes/, and click on the add button to create a new node.
Some of the settings during the node registration you should take care of are Remote root directory, Labels.
- The first one should be filled with home directory of the user account which we created in previous section and will be used to execute the Ansible commands, such as ansible-playbook.
- The value of the second one is the key you should fill in when you perform whatever the commands or pipelines on Jenkins portal. Each node joined in should be configured with a unique label to precisely identify. For example, if I only want to execute a test pipeline in a test node, I should specify the label of that test node in the execution.
After the agent node comes online, we can use Jenkins portal to complete the ACL creation task for us. In this case, we will write a Jenkins pipeline to arrange all the commands, configurations and variables together those we would like to ask the program to do instead of ad hoc commands in node’s shell.
Click on the New Item button in the dashboard and choose pipeline as the way we want Jenkins works for us, then we can fill in the pipeline configurations (see the example in Commands and Pipeline section for reference) and run the job, finally we can see the job successfully completed.
0x04 Commands and Pipeline
See blocks below for all the commands that used in this ariticle.
# Network interface configuration using *nmcli*
nmcli con show ens192
nmcli con mod ens192 ipv4.method manual \
ipv4.address <IP_Address/Mask> \
ipv4.gateway <Gateway_IP> \
ipv4.dns <DNS_IP>
nmcli con up ens192

# Hostname setting
sudo nmcli general hostname <Jenkins_Agent_Node_Hostname>

# User config for Jenkins platform
sudo useradd -m jenkins
sudo passwd jenkins

# Ansible installation
sudo -i
echo 'jenkins ALL=(ALL) NOPASSWD: /usr/bin/dnf, /usr/bin/yum' > /etc/sudoers.d/<config_name_for_jenkins_user>
sudo dnf install ansible-core

# SSH configuration for Cisco firewall
## Create .ssh dir for adding lower level KexAlgorithms support
mkdir -p -r 755 ~/.ssh/
cat << EOF > ~/.ssh/config
Host <Cisco_Firewall_IP_Or_Hostname>
	KexAlgorithms +diffie-hellman-group1-sha1
EOF
chmod g-w .ssh/config

## Change default crypto policy to support RSA-based SHA1 signare
sudo update-crypto-policies --set DEFAULT:SHA1

## Reboot to take effect
reboot

# Ansible configuration
ansible-galaxy collection install cisco.asa
sudo dnf install pip
python3 -m pip install paramiko dnspython

# Integration for Jenkins as an agent
sudo yum install java-11-openjdk-1:11.0.16.0.8-1.el9_0
java -XshowSettings:properties -version 2>&1 > /dev/null | grep 'java.home'
export JAVA_HOME=<populated with value from last command>
## Copy SSH public key to agent within the jenkins user
ssh-copy-id -i </path/to/your/public_key> <jenkins_user>@<target_agent_host>
pipeline {
    agent {label '<Label_For_Jenkins_Agent_Node>'}

// Define environment viriables in envrionment block, you can use credentials module to store your secret content. e.g, password
  environment {
      ANSIBLE_HOST_KEY_CHECKING = 'False'
      VAULT_PASS_FILE = credentials('Ansible_Vault_File')
      URL_DOMAIN_VAR = "<Domain_Name>"
      DNS_SERVER_VAR = credentials('DNS_Server')
      TODAY_DATE_VAR = sh(returnStdout: true, script: 'date +%Y%m%d').trim()
      RECORD_FILE_PATH = "/home/jenkins/Ansible/dns_resolving_records/dns-resolved-${URL_DOMAIN_VAR}-${TODAY_DATE_VAR}.txt"
  }

    stages {
// Use a simple python script for DNS resolving and write back to file
        stage('DNS_Resolving') {
            steps {
                sh '''
                /usr/bin/python3 /home/jenkins/Ansible/dns_resolv.py ${DNS_SERVER_VAR} ${URL_DOMAIN_VAR}
                /usr/bin/cp /path/to/original/role/ymlfile /path/to/backup/role/ymlfile
                '''
            }
        }

// Use sed to replace the ACL lines in the tasks file in role folder with the dns records which we got in previous stage
        stage('Playbook manipulation') {
              steps {
                sh '''
                  for i in $(cat ${RECORD_FILE_PATH}); do /usr/bin/sed -i \
                  "s/lines:/lines:\\n      - access-list  extended permit ip object-group <Group_Name> host $i/g" \
                  /path/to/original/role/ymlfile; done
                 '''
                }
              }

// Execute the playbook with ansible-playbook command and finally restore the tasks file to default status for next job
        stage('Run Ansible playbook') {
              steps {
                sh '''
                  /usr/bin/ansible-playbook -i /home/jenkins/Ansible/hosts.ini /home/jenkins/Ansible/playbook.yml --vault-password-file ${VAULT_PASS_FILE}
                  /usr/bin/mv /path/to/backup/role/ymlfile /path/to/original/role/ymlfile
                 '''
                }
           }
     }
}